Admin Guide
The Time Machine Reader app runs as a Windows service, while the web backend runs under Docker. Both together make the app known as tmtility.
Installation
Docker Installation
See https://docs.docker.com/desktop/install/windows-install/ for installation of Docker before installing this application.
Install wsl. You may need to enable virtualization. See https://aka.ms/enablevirtualization for details.
wsl --install
Follow instructions in https://docs.docker.com/get-docker/
install Docker Desktop Installer (https://docs.docker.com/desktop/install/windows-install/)
Note
the application is a Linux container, so ignore all the stuff about windows containers on the webpage
Bluetooth Pairing
Before using the app, the Time Machine wireless interface or barcode scanner needs to be connected to the laptop’s bluetooth. These instructions are for Windows 11.
For the Time Machine connection, make sure the Time Machine has the Wireless Interface connected, and is powered on. The Wireless Interface LED should be blinking red.
For a barcode scanner, make sure the scanner is powered on and in SPP mode. The scanner should be in pairing mode. See the scanner’s user’s manual for details.
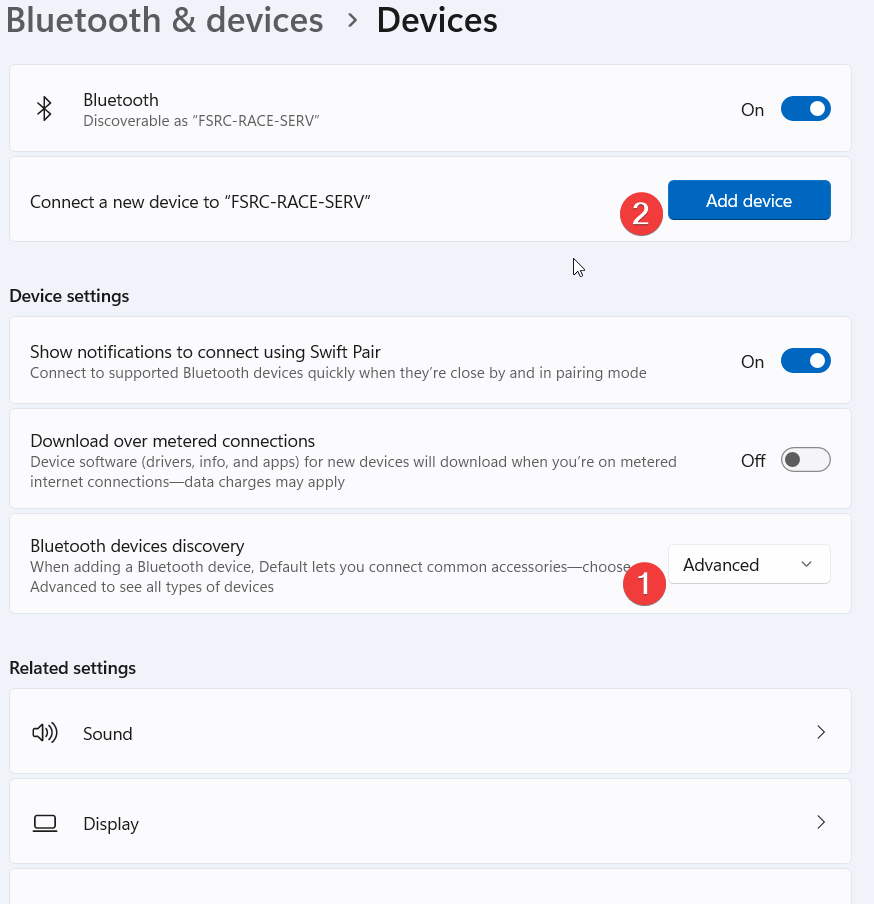
In the taskbar’s search bar, search for bluetooth. Click on Bluetooth and other devices settings. Set Bluetooth devices discovery to Advanced, then click Add Device.
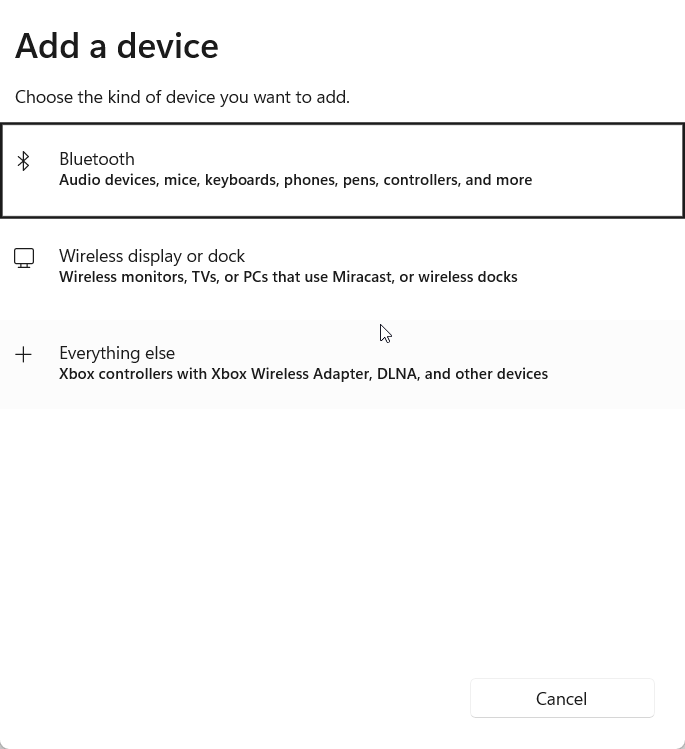
Then click Bluetooth
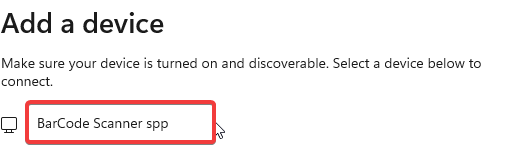
Select the device you’re trying to pair with. In this case it’s a barcode scanner BarCode Scanner spp. Make note of the name used for this connection as it will be needed when configuring the Bluetooth Devices view.
Click Connect
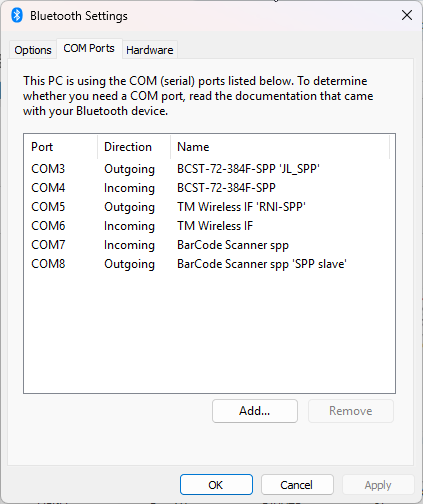
To verify the bluetooth connection worked properly, in Bluetooth and other devices settings, under Related settings click More Bluetooth settings.
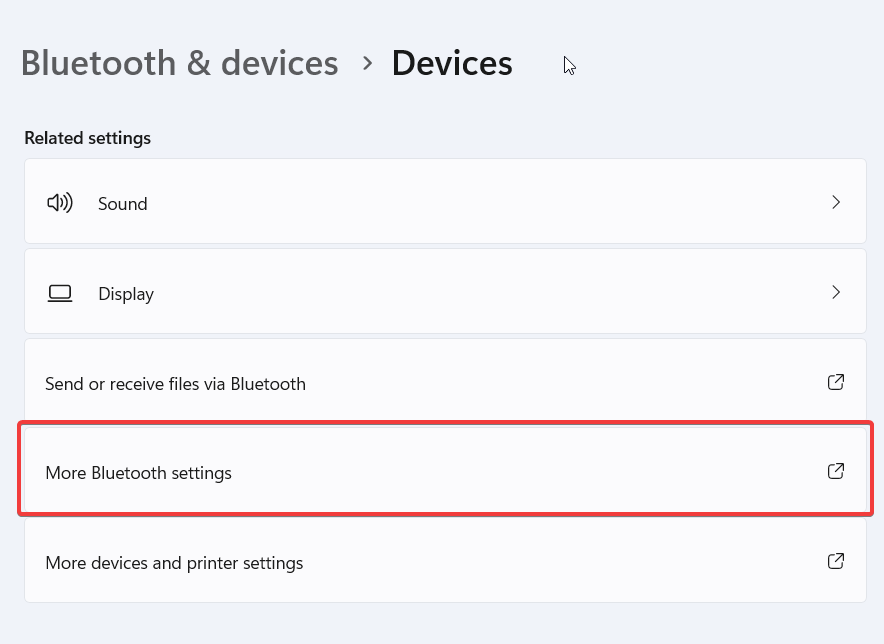
Under the COM Ports tab, you should see the Outgoing and Incoming ports for the device you just connected.
Now you need to determine the device’s Bluetooth Hardware address.
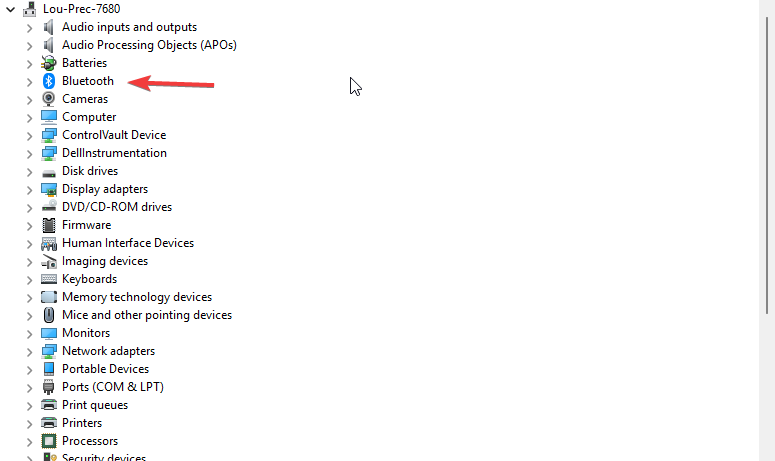
bring up the Windows Device Manager (Windows-x > Device Manager)
expand the Bluetooth section
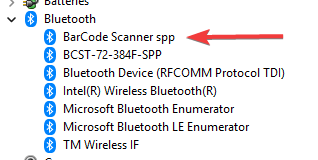
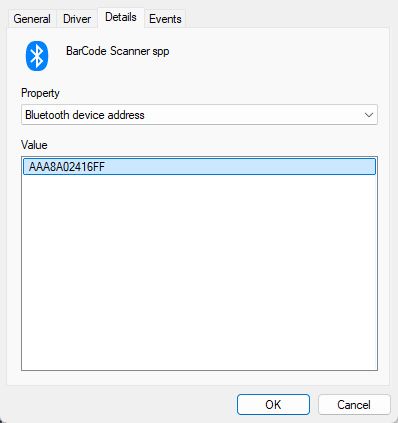
right-click on the device you just connected, and select Properties > Details
select Bluetooth device address from the Property dropdown
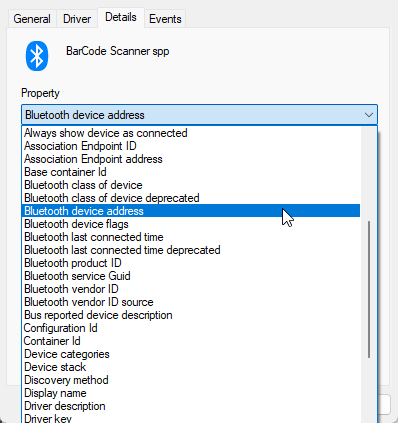
copy the value of the Value field. This is the Bluetooth Hardware address for the device, and will be used in the Bluetooth Devices view
create the device using Bluetooth Devices view. The Name field should be a suitable name of the device you just connected (label the device with this), and the Type field should be set to the type of device you just connected. The HW Addr field should be set to the Bluetooth Hardware address you just copied.
App Installation
download https://github.com/louking/tm-csv-connector/blob/main/dist/tm-csv-connector.zip
Note
your browser may want to scan the file for malware/virus. let it
extract files from the downloaded file into the directory you want the app to run from
start powershell Run as Administrator, and navigate to this directory
Note
you’ll have to accept the User Account Control challenge, which may be seen elsewhere on the taskbar
before you execute these commands for the first time, you’ll need to do the following
edit `c:\Windows\System32\Drivers\etc\hosts`, add 127.0.0.1 tm.localhost
# you'll need to restart the laptop for this to be available to browser
Set-ExecutionPolicy Bypass [<ExecutionPolicyScope>] # type y to accept
# for details see https://learn.microsoft.com/en-us/powershell/module/microsoft.powershell.security/set-executionpolicy
docker login # then enter your credentials
run the install procedure
./install
if you see something similar to the following, type a for Yes to All
The package(s) come(s) from a package source that is not marked as trusted.
Are you sure you want to install software from
'https://onegetcdn.azureedge.net/providers/nuget-2.8.5.208.package.swidtag'?
[Y] Yes  [A] Yes to All  [N] No  [L] No to All  [S] Suspend  [?] Help (default is "N"):
enter directory names for the output csv file, and for the logging files (full path)
enter passwords for root and app database users – accepting the defaults are fine
Note
you can see the values of these later by navigating to
config/dbin the installation directorythe first time it’s run, it takes a bit of time for the app to create the database, etc
with your browser, navigate to http://tm.localhost:8080/
navigate to Settings view (this only has to be done once)
add New setting, Setting=output-file, Value=tm-data.csv # or whatever filename you want the output put in
App Upgrade
download https://github.com/louking/tm-csv-connector/blob/main/dist/tm-csv-connector.zip
Note
your browser may want to scan the file for malware/virus. let it
start powershell Run as Administrator, and navigate to the install directory
Note
you’ll have to accept the User Account Control challenge, which may be seen elsewhere on the taskbar
disable the app
./disable-all
extract files from the downloaded file to the install directory
run the install procedure
./install
if you see the error
./install : File <...>\install.ps1 cannot be loaded. The file <...>\install.ps1 is not digitally signed. You cannot run this script on the current system.
For more information about running scripts and setting execution policy, see about_Execution_Policies at https:/go.microsoft.com/fwlink/?LinkID=135170.
At line:1 char:1
+ ./install
+ ~~~~~~~~~
    + CategoryInfo          : SecurityError: (:) [], PSSecurityException
    + FullyQualifiedErrorId : UnauthorizedAccess
enter the following
Set-ExecutionPolicy Bypass CurrentUser # type y to accept
./install
Set up RaceDay Scoring
at Streams
 panel, create a stream for Time Machine
Stream Name: Time Machine
Stream Type: File (Custom or Chip System Type)
File Type: File (Custom or Chip System Type)
Folder Path: MAIN-FOLDER-PATH
File Extension: csv
Passing Format: [IGNORE],[BIBCODE],[TIME]
Field Delimiter: ,
Assign as a Backup Stream for these Timing Locations: Finish
Bluetooth devices
Bluetooth devices are used to connect the Time Machine and Barcode Scanner to the laptop. The Bluetooth device must be set to SPP mode, paired with the laptop, and configured in Bluetooth Devices view before starting the app.
To configure a bluetooth device,
set the device into pairing mode (see the device’s user’s manual)
use the laptop’s bluetooth settings to pair the device with the laptop
Bib Barcode Scanner
A bib barcode scanner can be used to automatically serialize bibs which cross the finish line, similar to the use of pull tags and a spindle. tmtility was tested with Tera Model H00002 and inatech BCST-72 scanners. The requirement is that the scanner connect via a USB port, and send the bib numbers followed by one or more CR (\r) or LF (\n) characters.
The scanner needs to be set to use SPP mode after a factory reset. See the scanner user’s manual for details. The scanner should be paired with the laptop before starting.
Jackery Working Time
Jackery Portable Power Station 240 uses 241Wh * 0.85 / operating power of device
for Dell Inspiron 15 3520 laptop, max operating power is 45W, so Jackery gives 4.5 hours of full-throttle runtime, plus laptop battery reserve